Assessment and completed coursework
OpenOlat makes it possible to carry out examinations and coursework online. It also offers comprehensive monitoring and logging options so that teachers can assess and evaluate students' progress and performance. This helps them to better understand students' learning progress and develop optimized teaching methods where necessary.
You can also try out the course elements and examples described in the “OpenOlat Rundgang” directly in the course of the same name. There you will also find numerous other practical examples and orientation aids
Click here for the accompanying course in OpenOlat (German only).You can use the following navigation to jump directly to the relevant sections.
There are numerous options for completing coursework in OpenOlat, as the examination regulations generally give you a great deal of freedom. Below are some practical examples of how you can use selected course elements to complete coursework:
Participant folder
The participant folder course element offers a structured and data protection-compliant system for students who want to complete coursework in your course. Your students can use this to upload their documents in individual participant folders. Only you and, if applicable, other teachers in the course with the status of course owner and supervisor can access these folders, so that you can use a protected space for submissions and feedback.
Only two folders are made available in this: the participant drop box, which is used to submit files to the supervisors, and the supervisor return box, where you can return files to the participants, for example with corrections and suggestions. You can find the submitted coursework clearly in one place.
You can also configure subfolders in the settings of the course element in the Template settings tab (see Fig. 1) in order to coordinate the submissions even better.
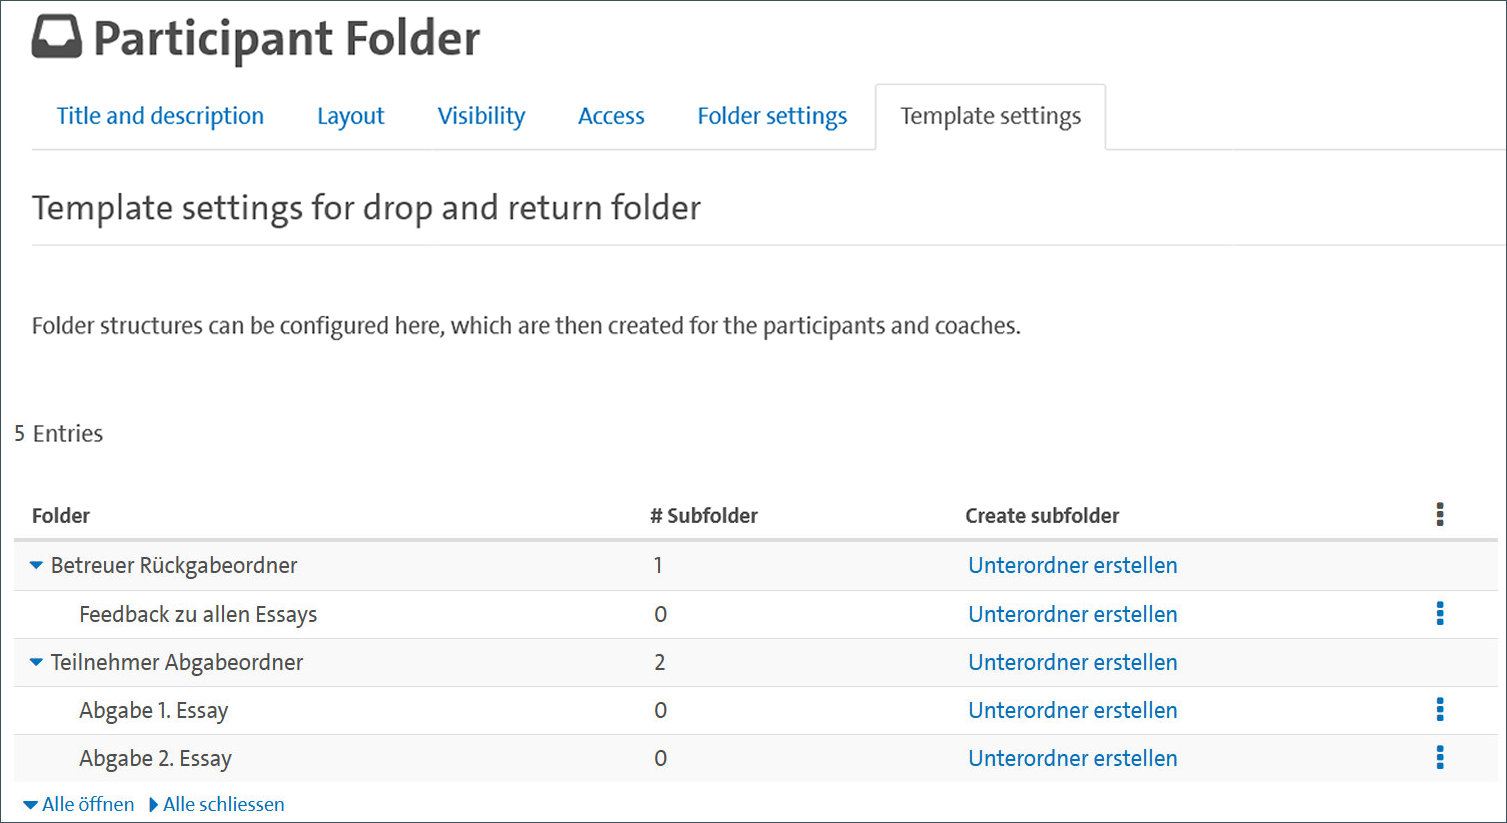 Fig. 1: The template settings of the participant folder
In the folder settings in the course editor, you can select whether or not course members should be allowed to delete and overwrite files. You can also define a time window for the submission in which documents can be uploaded. You can also limit the maximum number of documents that can be uploaded.
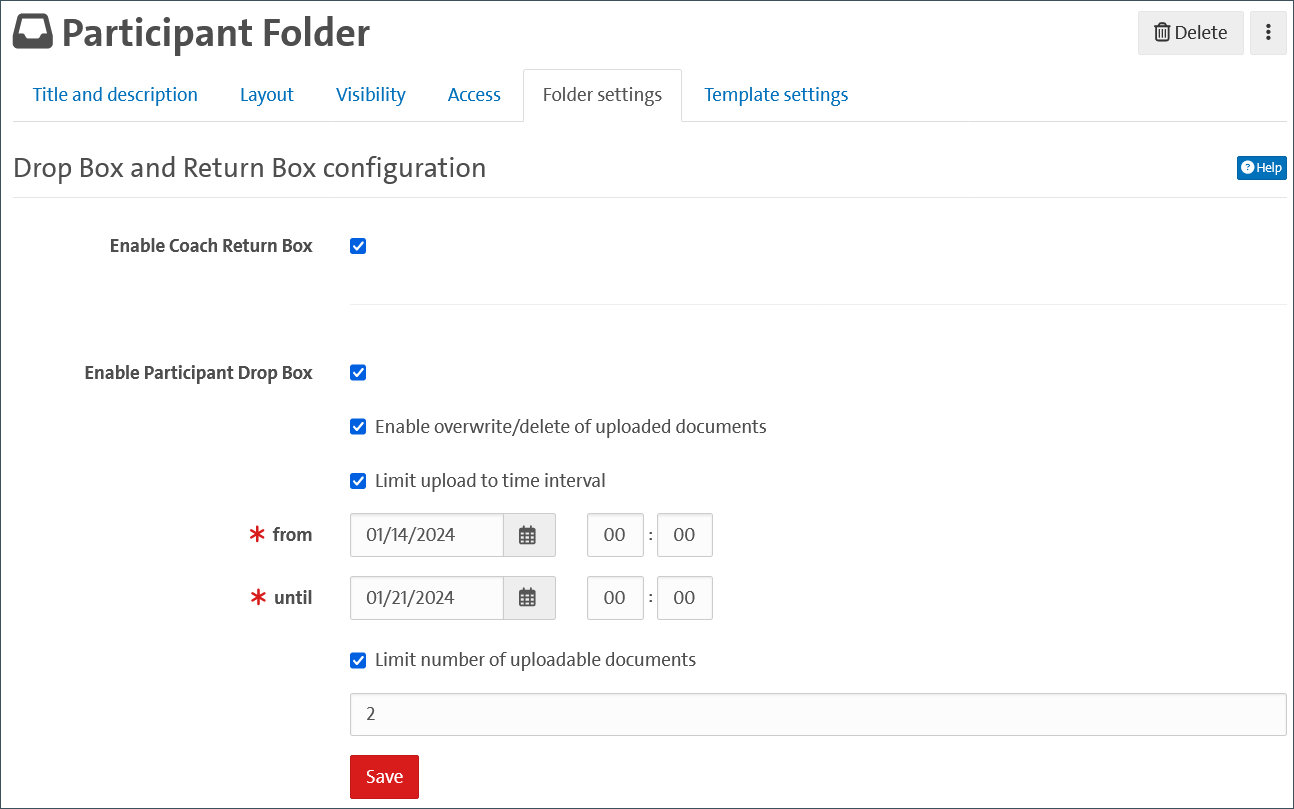 Fig. 2: Configuration of the participant folder
|
Tip: In the settings of the course element, provide information on the correct naming of the files in the description text (see Fig. 3). This is a detail that students often only learn in the course of their studies, but it makes organization much easier for both parties. You can also use the reminder function to automatically notify students of submission deadlines. |
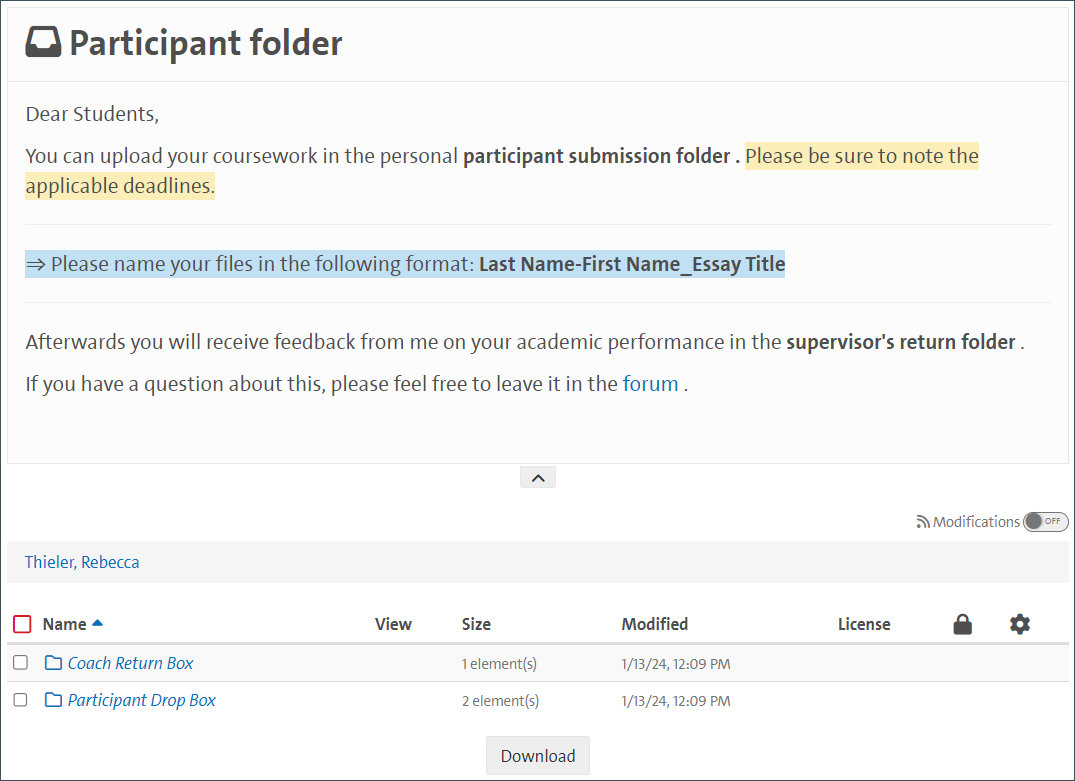 Fig. 3: An examplary participant folder
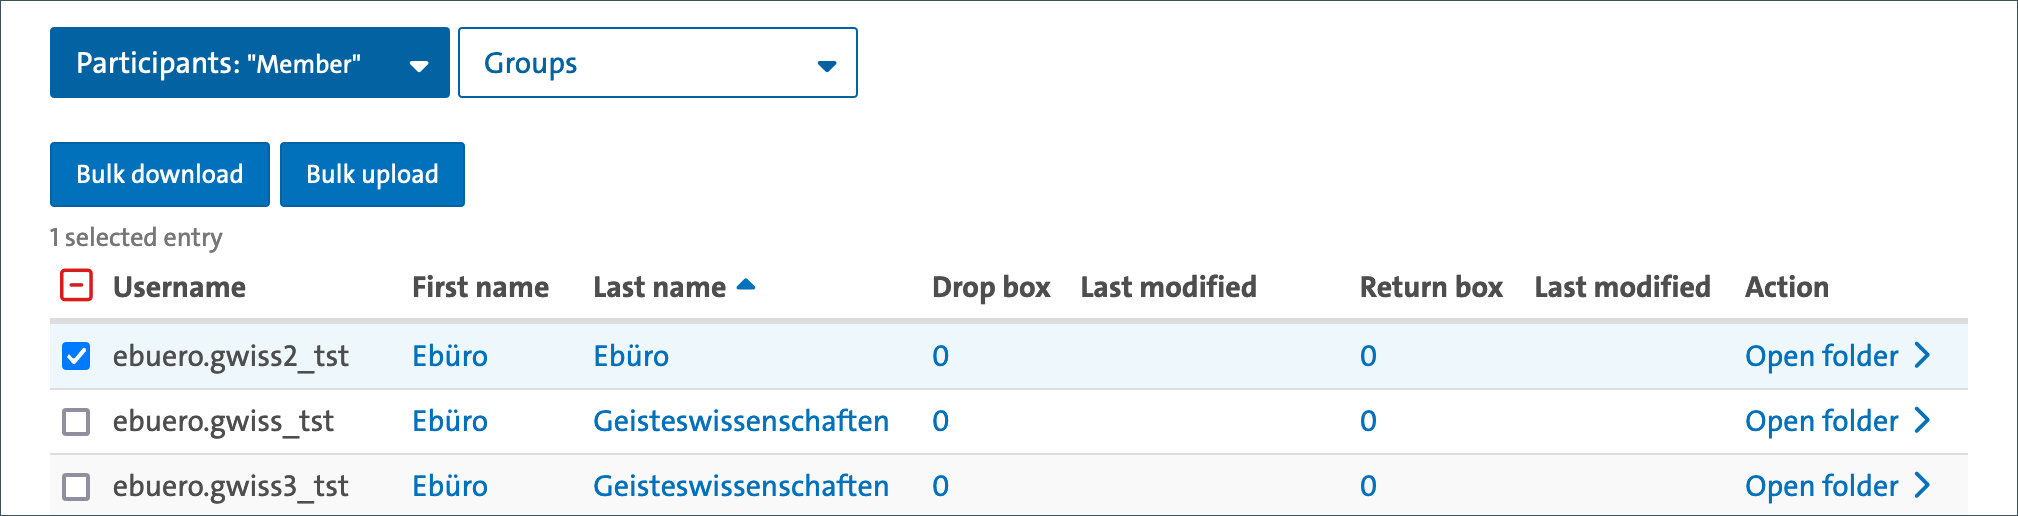
If you want to download several submitted files at the same time, you must select the corresponding entry via the left-hand checkbox (see Fig. 4). Only then will you be offered the option for bulk download. You can also use the same method to simultaneously distribute several documents to the selected “Supervisor return box” , or you can use the function to create predefined folder structures at the same time (e.g. folder numbering according to submission dates).
Portfolio
With the Portfolio Task course element, you can create a support basis for the students with which you can track and accompany their learning progress and development.
The design options for a portfolio template are very extensive. OpenOlat offers two different portfolio configurations: The assessment portfolio and the learning portfolio.
Learning Portfolio
The learning portfolio can be seen as a free workspace for students to document their learning progress, homework, additional tasks and individual submissions. It is important to discuss the requirements for the format and scope of the content of the portfolio with the students in advance if you are using it for coursework or examinations. Furthermore, the technical handling of the portfolio should be tested together. As a result, all students have differently filled portfolios, which they can then activate for feedback.
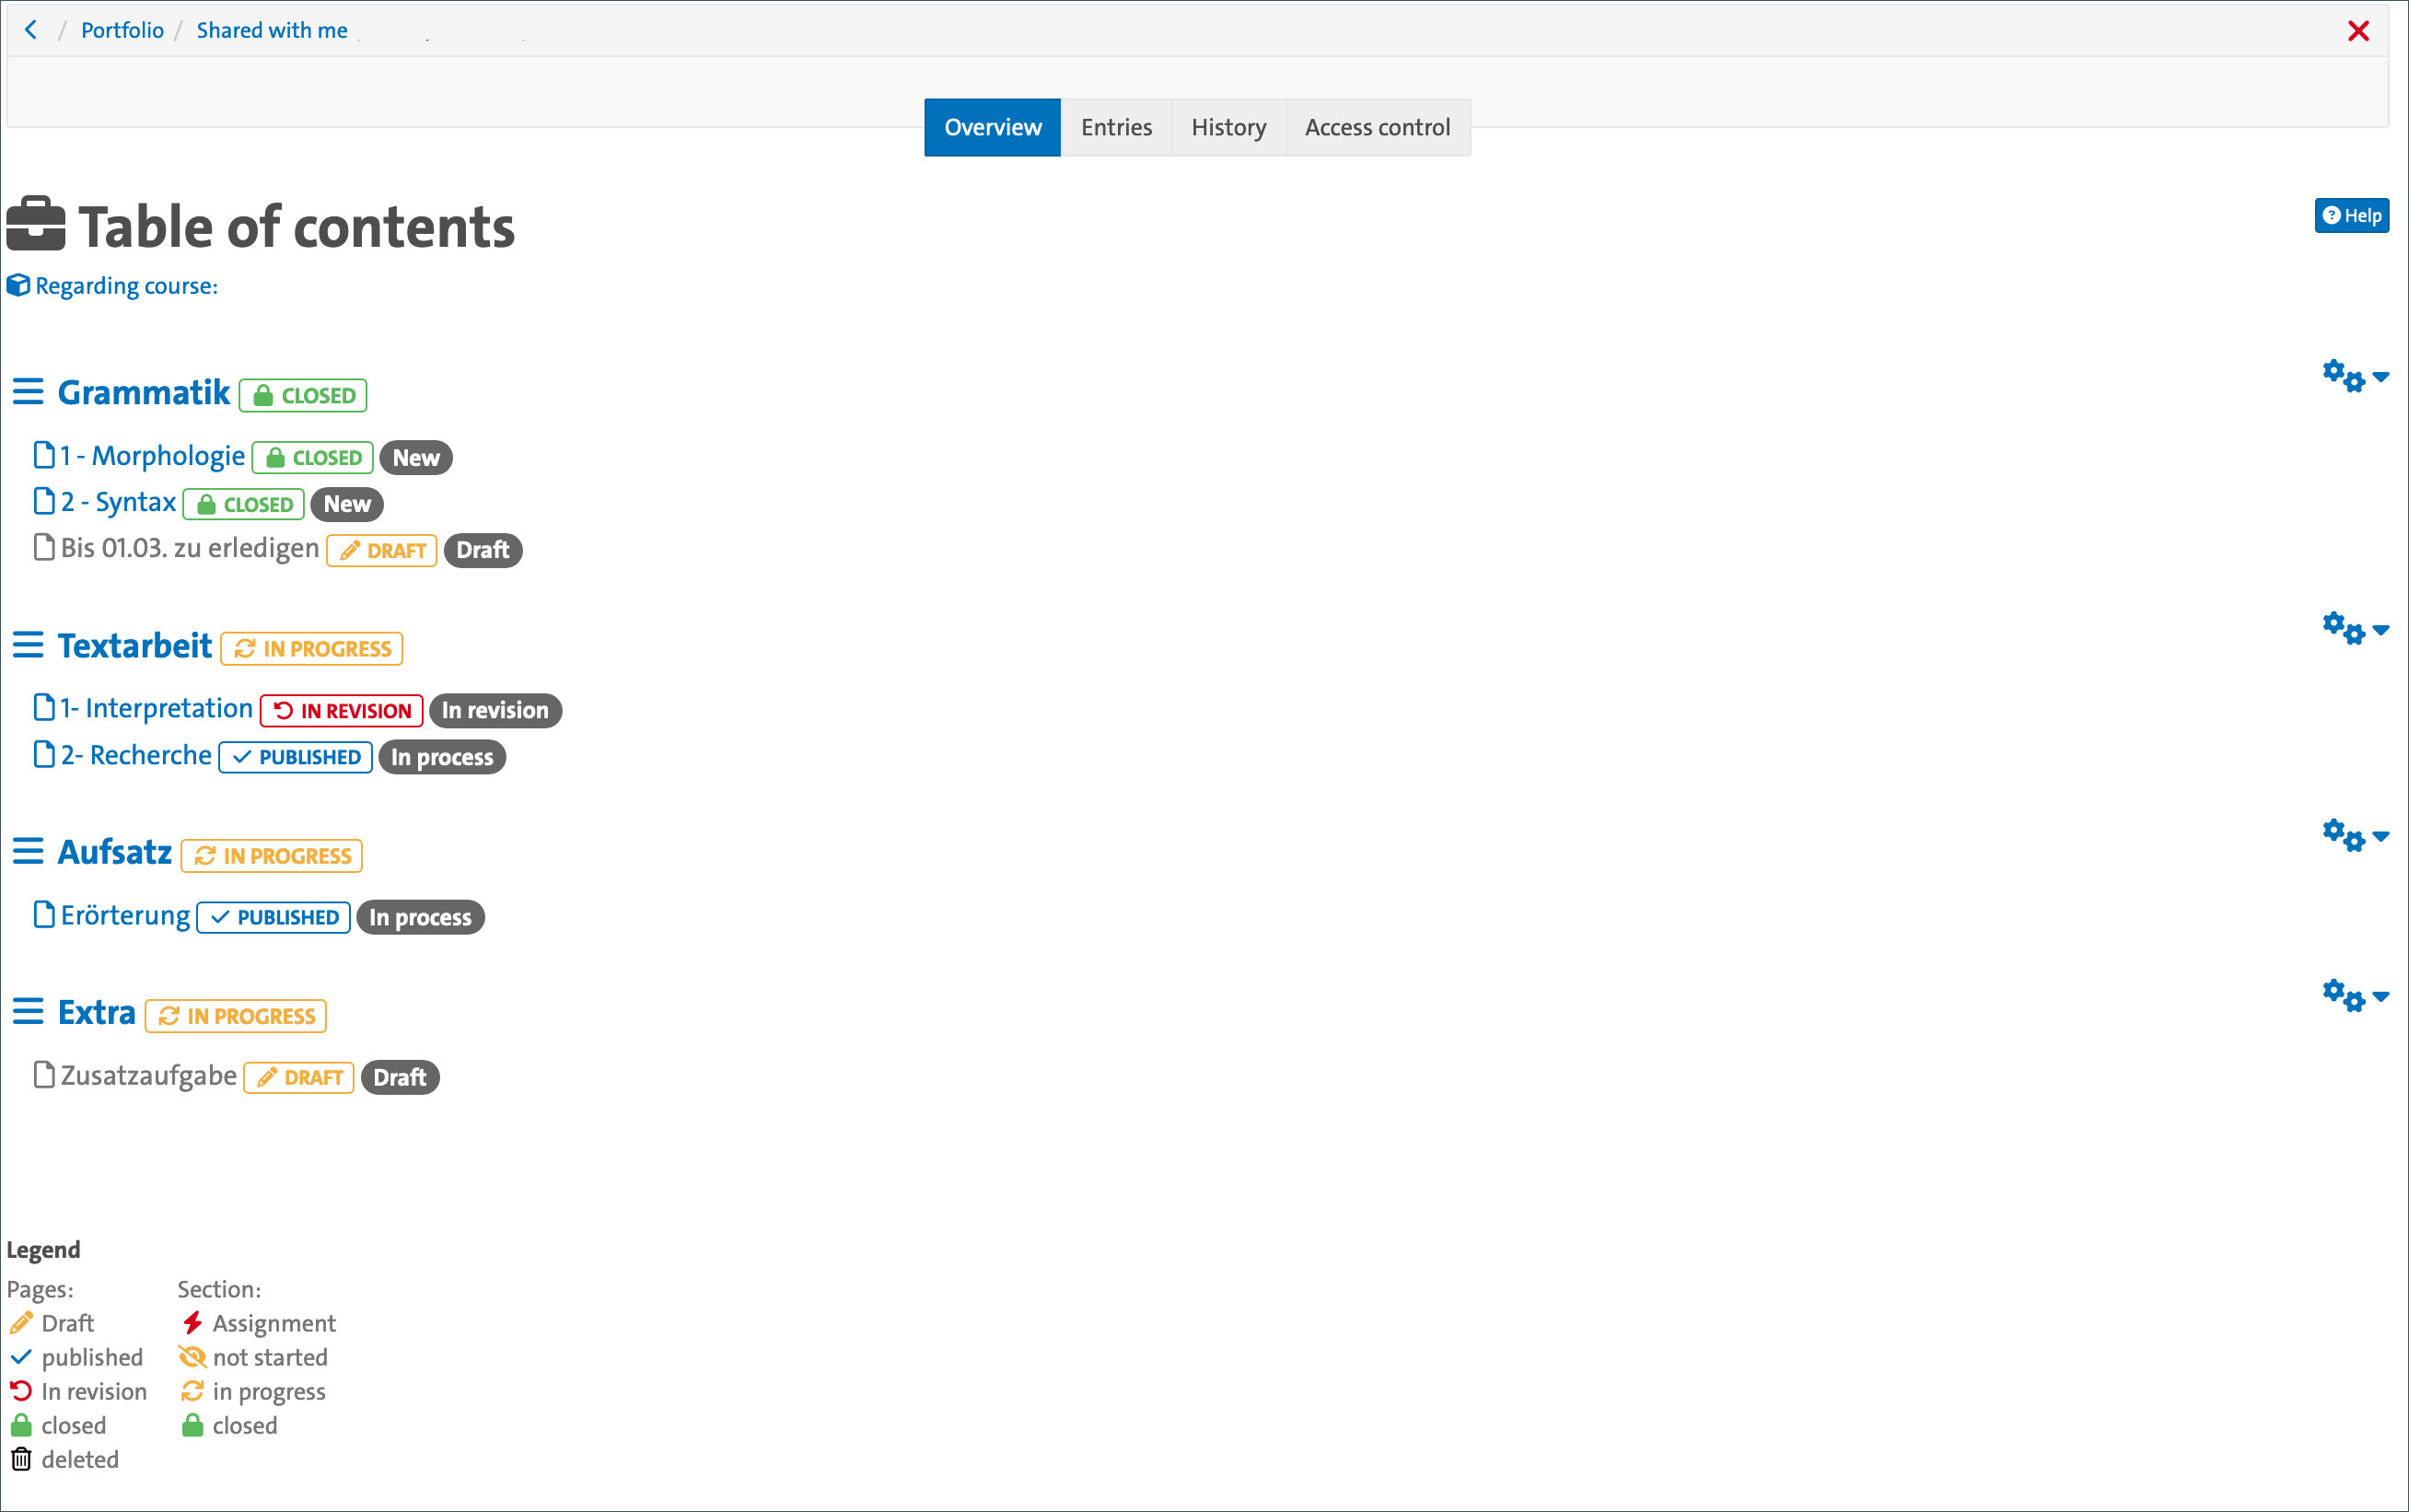
The portfolio in OpenOlat consists of several areas to which entries are assigned. Students can upload and organize texts, images, videos or other content there. The sections can be customized according to individual needs.
| Tip: The portfolio in OpenOlat can also be used to promote exchange and collaboration between students. You can share and comment on your portfolios by sharing individual portfolio tasks or entries or entire portfolios. |
You will find a 3-step guide to the creation of portfolios by students here in the OpenOlat manual. You are also welcome to make this link available to students.
If students have completed a portfolio task and published at least parts of it, the portfolios of other people can be viewed and, depending on the settings, also evaluated. As a teacher, you can then access the student's portfolio and provide feedback by adding notes, comments or ratings.
The following screenshot shows what a portfolio might look like:
Feel free to contact us if you need individual tips for creating a portfolio.