Course management for advanced users
OpenOlat offers some practical tools that make your work easier, especially if you maintain several courses and want to delve deeper into the functionalities.
You can also try out the course elements and examples described in the “OpenOlat Rundgang” directly in the course of the same name. There you will also find numerous other practical examples and orientation aids.
Click here for the accompanying course in OpenOlat (German only).You can use the following navigation to jump directly to the relevant sections.
Reminders
Would you like to send a reminder e-mail to your students the day before a course assignment is due? You can use the reminder function under Administration to send a predefined e-mail to your course members if a rule you have defined applies. For example, this could be a reminder for a test or a seminar assignment that has not yet been completed. Reminders can also be sent if, for example, a member has not yet registered for an appointment. The automatic e-mail only reaches course members if the rules you have selected are met.
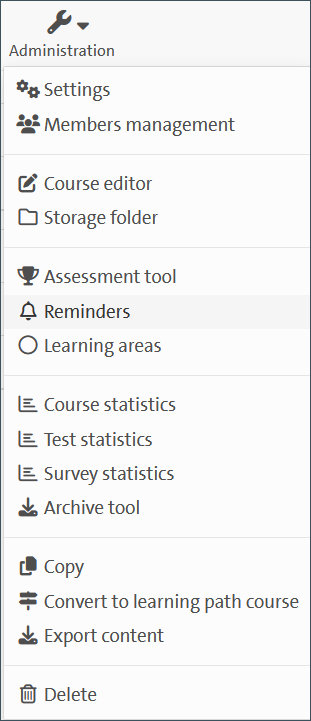
It can also be used to send automatically generated messages if, for example, coursework in a task or portfolio module has been declared as passed or failed. You can configure the time or content rules according to which the e-mail is sent under “Add reminder” .
You can find out more about setting reminders on HelpCard 20-090 Kurserinnerung “Test” (in German) in the DL-portal.
Alternatively, it is possible to set reminders for various course projects (assignment, test, enrollment, scheduling, etc.) within the course editor and within the configuration options. This may save you time compared to the first method. You will then find an overview of all reminders created under Administration.
Account Options
The account settings in OpenOlat allow users to manage their personal information and user settings. This includes, for example, customizing the profile picture, updating contact information and managing notification settings under the Profile tab.
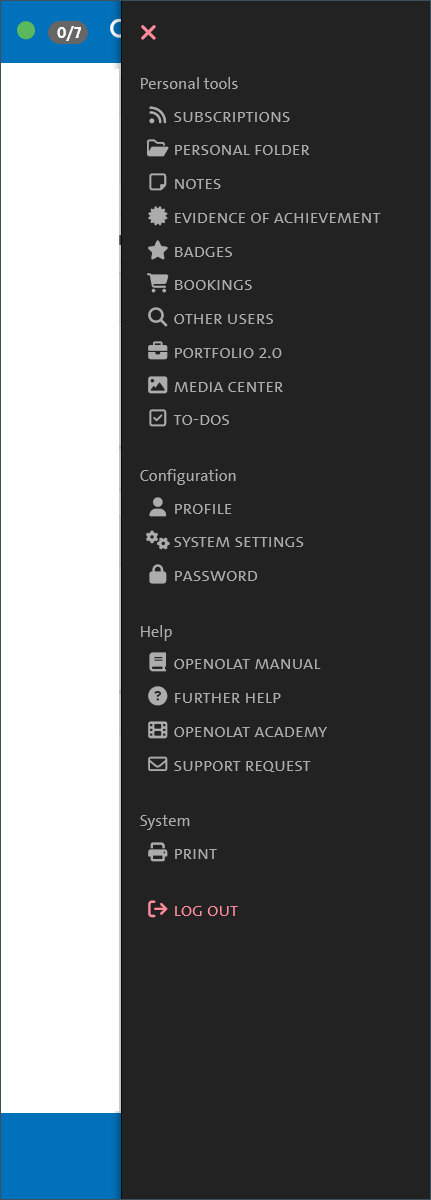
You will also find a selected overview of other personal tools below:
The assessment tool
The assessment tool provides an overview page for all course elements that can potentially be evaluated. This includes, for example, tests, assignments or group tasks. The survey tool not only offers you an attractive overview of all relevant course elements, but also provides you with all the tools you need to carry out, adapt and control surveys.
We would like to show you the most important functions using the example of a test course element, which you can try out for yourself in the accompanying course of this “Rundgang” (In German):
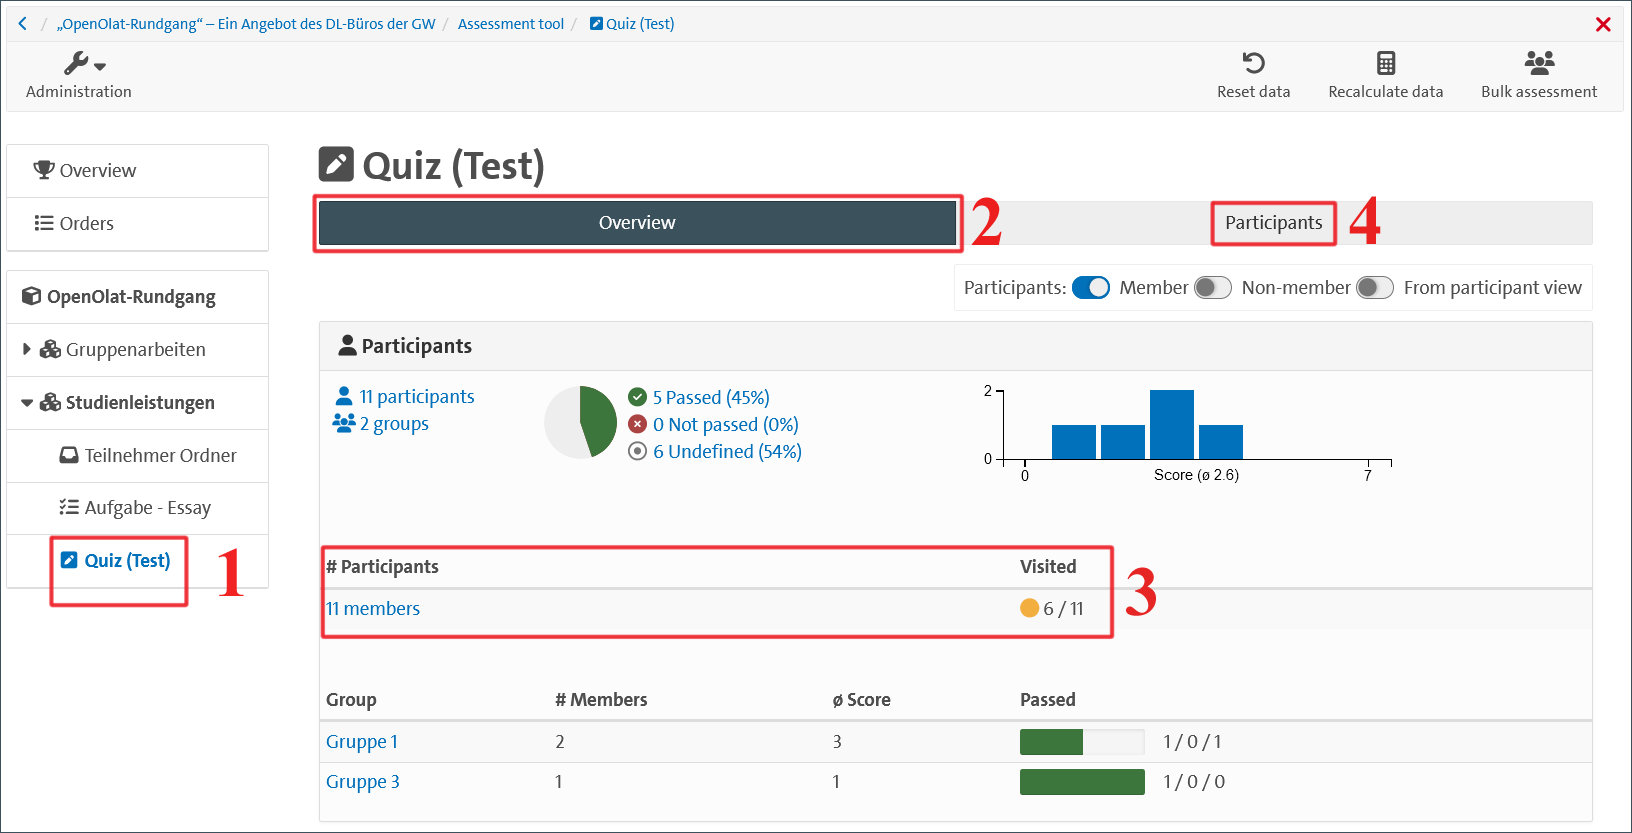 Fig. 3: Assessment tool configuration “Overview”
- In the menu bar on the left, select the course element you want to work with.
- On the overview page of the respective course element, you can see the most important information.
- Among other things, you can see how many participants have already started the course element.
- Click on the “Participants” tab at the top to display detailed functions for the survey.
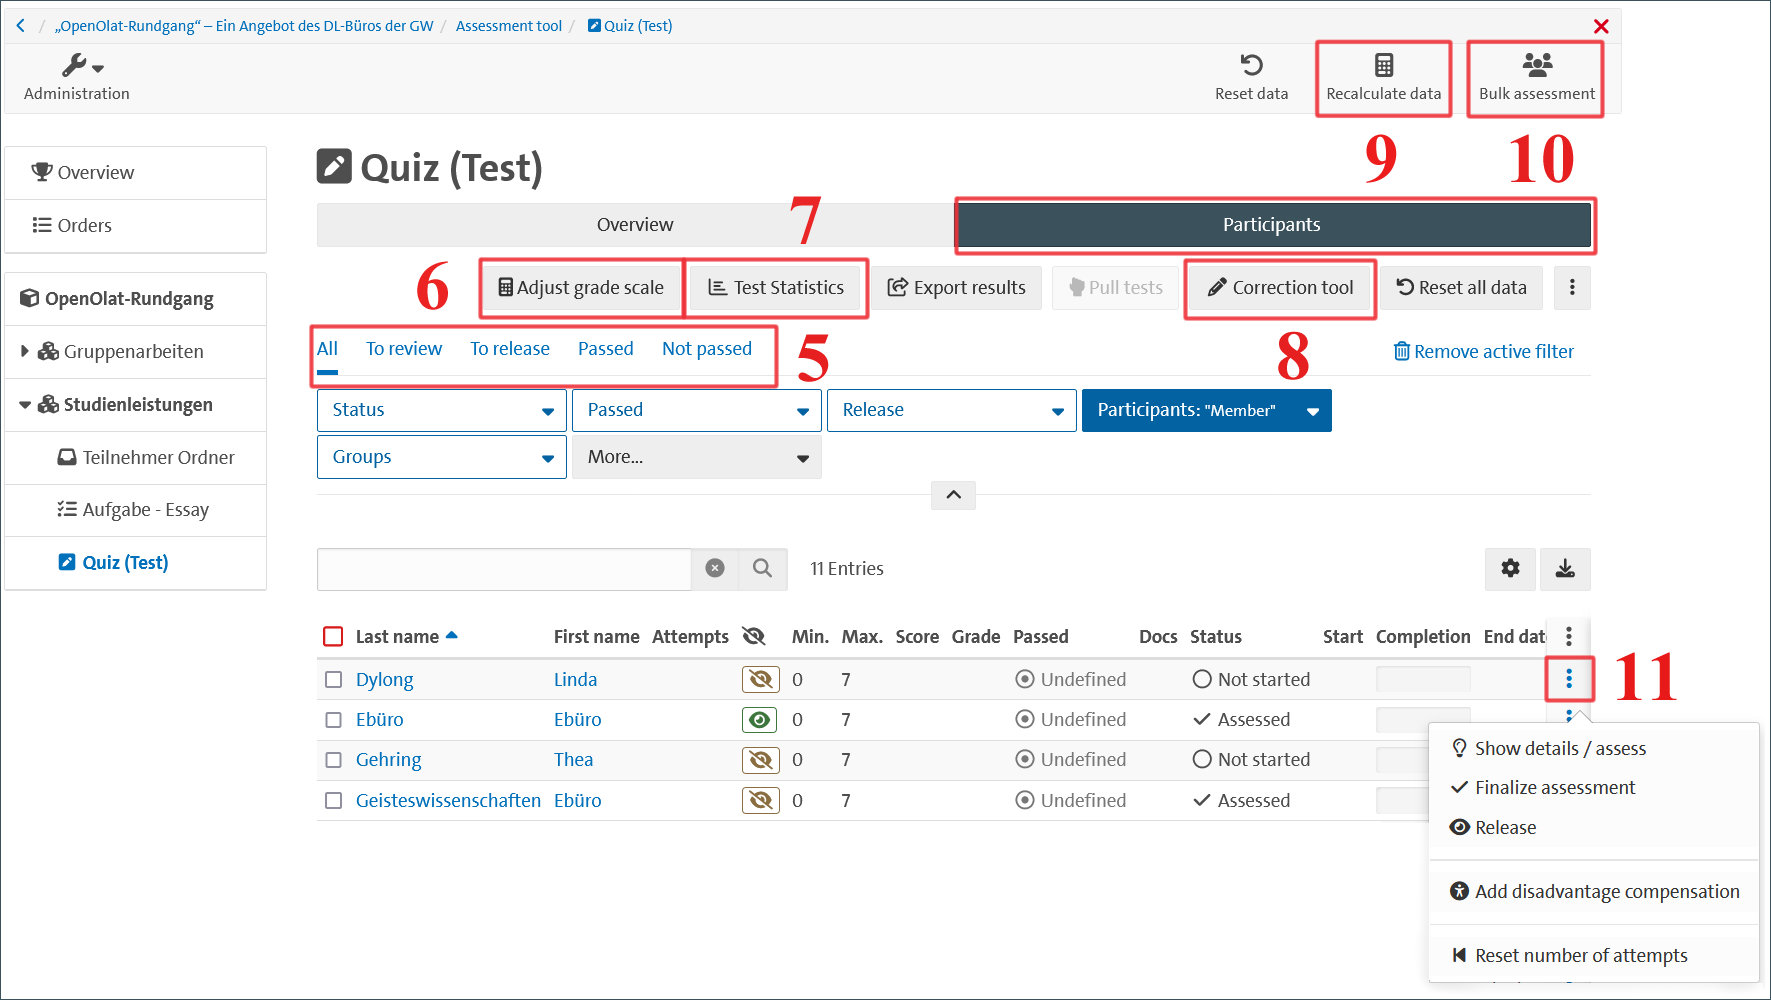 Fig. 4: Assessment tool configuration “Participants”
-
In these tabs, you can filter the “Participant list” below according to certain criteria.
-
If you would like to adjust the grading scale as part of the automatic survey, you can do so in this area. This also allows you to adjust the “pass/fail” threshold at a later date. If you change the grading scale after an automatic survey, the points for the respective students are also automatically adjusted according to the changed grading scale.
-
In this menu you can view the statistics of the course element. There you can not only view overall statistics, but also analyze each item in detail.
-
In the correction tool, you can then correct the individual items for each user. It is particularly useful if there are items to be evaluated manually.
-
If there are still special cases, but you already want to correct the already submitted assignments or other parameters, such as the rating scale, have been changed, you can use this button to recalculate the test data.
-
You can use mass survey to evaluate and release large quantities of tests. However, this only needs to be used if OpenOlat does not take over the automatic survey.
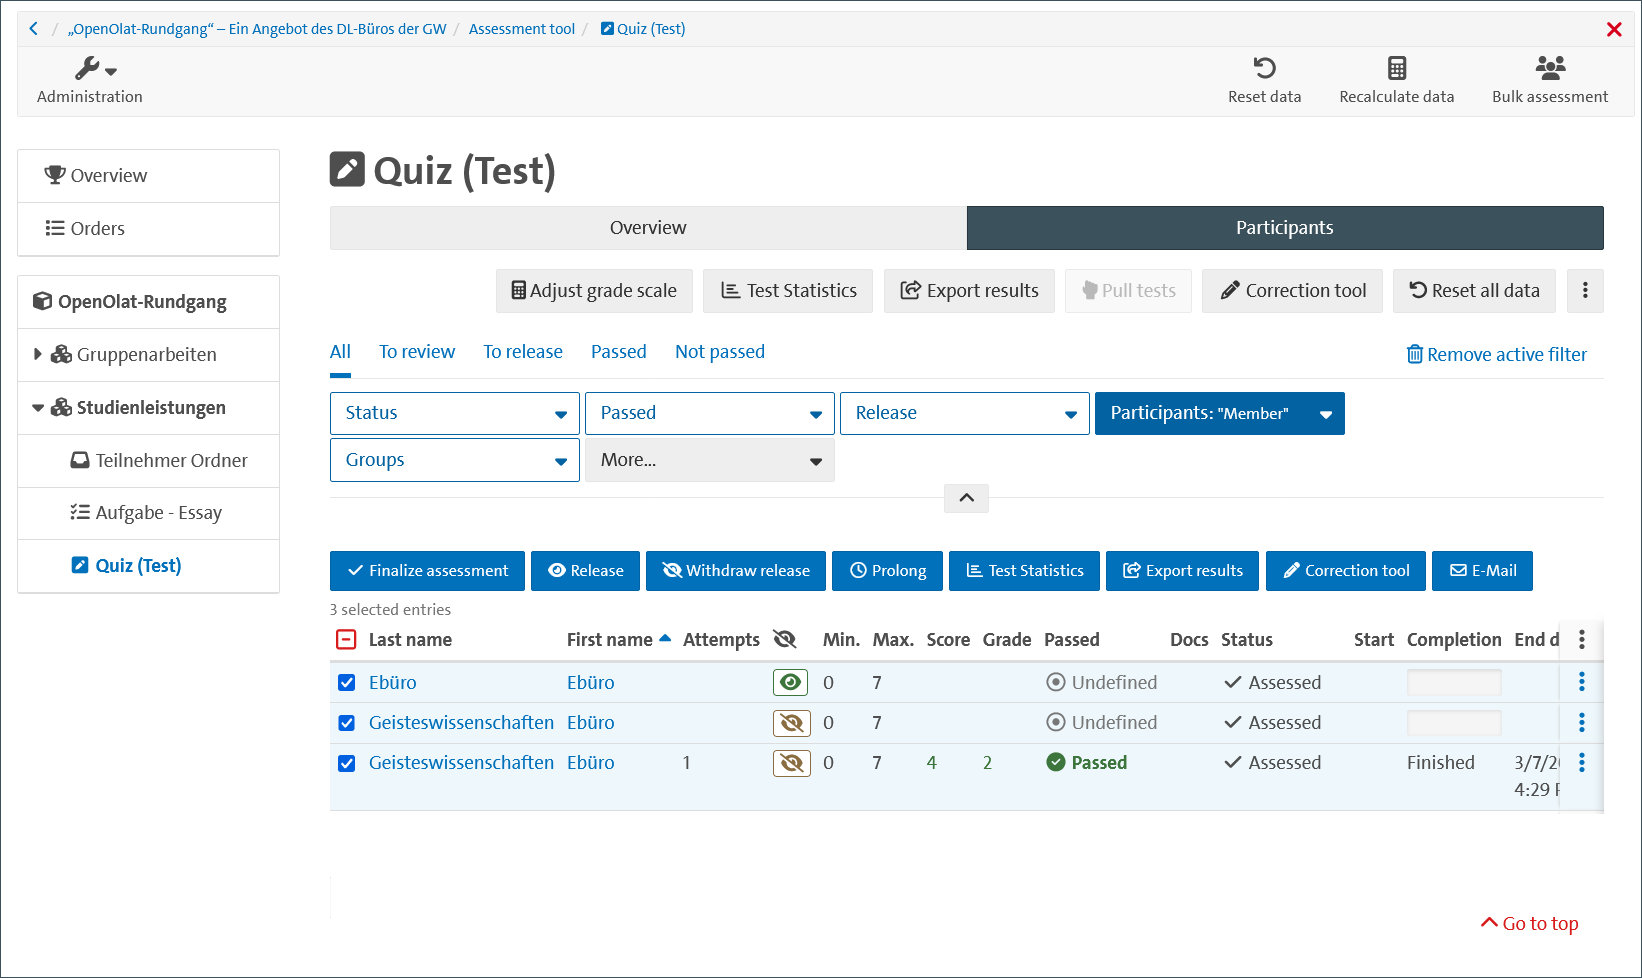 Fig. 5: Further assessment options
There you can not only approve an assessment, but also withdraw the approval. Further you can set the visibility of the results, extend the submission deadline or send e-mails based on test results.
| Tip: The course elements “Test” and “Task” in particular are very comprehensive in order to do justice to the wide range of study and examination services at the University of Hamburg. Our tip would be to create a relaxed quiz in advance, for example, to give you and the students the necessary freedom to familiarize themselves with the test environment without stress. You can find an example of this in our accompanying course in OpenOlat (In German). |
In addition, OpenOlat's familiar multi-track operating principle is also used in the survey tool: different paths often lead to the same goal. Whether you use the correction tool (8) or start the correction by selecting a checkbox (11) is not important because the same function is behind it. So do not be intimidated by the many buttons.
External users
Since the 17.0 update, OpenOlat also enables collaboration with people who are not members of the University of Hamburg. This allows you to organize and manage cross-location research projects directly in OpenOlat for example. However, external users cannot create courses and technically have the same role as students. To add external users, go to the members management of the relevant course (see Fig. 6) and open the selection menu under “Add members”. Then select the relevant button. Afterwards, a window will open in which you can choose whether you want to add one or several people directly.
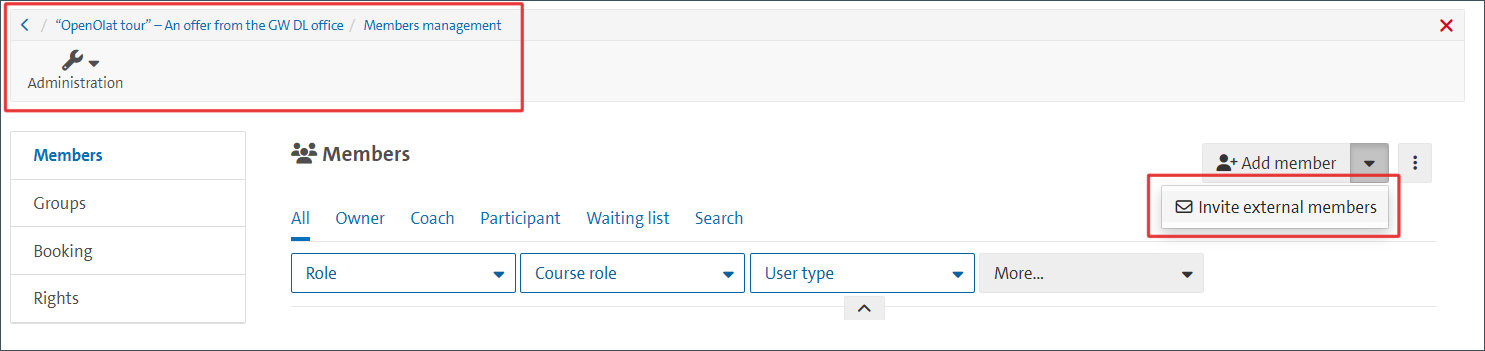
After you have sent out the invitation, the person in question will receive an e-mail. If a local user account has not yet been created, the invited person will be asked to do this in the first step. However, if the invited person already has a local account at the e-mail address you provided, they will only receive an invitation message by e-mail.
Please note: All members of the University of Hamburg (teaching staff, students, employees) automatically have an OpenOlat ID that is linked to their UHH user name (STiNE/“B-Kennung”). You do not need to create an external ID for students. If there are any problems logging in, you can refer that person to Support.