Provide teaching and learning content in an OpenOlat course
During their studies, both lecturers and students encounter numerous external websites that, for instance, supplement and facilitate the research of literature or image sources. Other helpful websites such as image archives, research portals and journals are also presented.
You can make these pages available to students in OpenOlat using the HTML page or link list course elements. OpenOlat offers the opportunity to upload and download multifaceted teaching and learning content quickly and easily. The rapid exchange of data and information between students allows synergy effects to be created that promote learning with little effort. In this tour, we will take a detailed look at which course elements can be used for this purpose.
You can also try out the course elements and examples described in the “OpenOlat tour” directly in the course of the same name. There you will also find numerous other practical examples and orientation aids.
Click here for the accompanying course in OpenOlat (German only).You can use the following navigation to jump directly to the relevant sections.
Folder
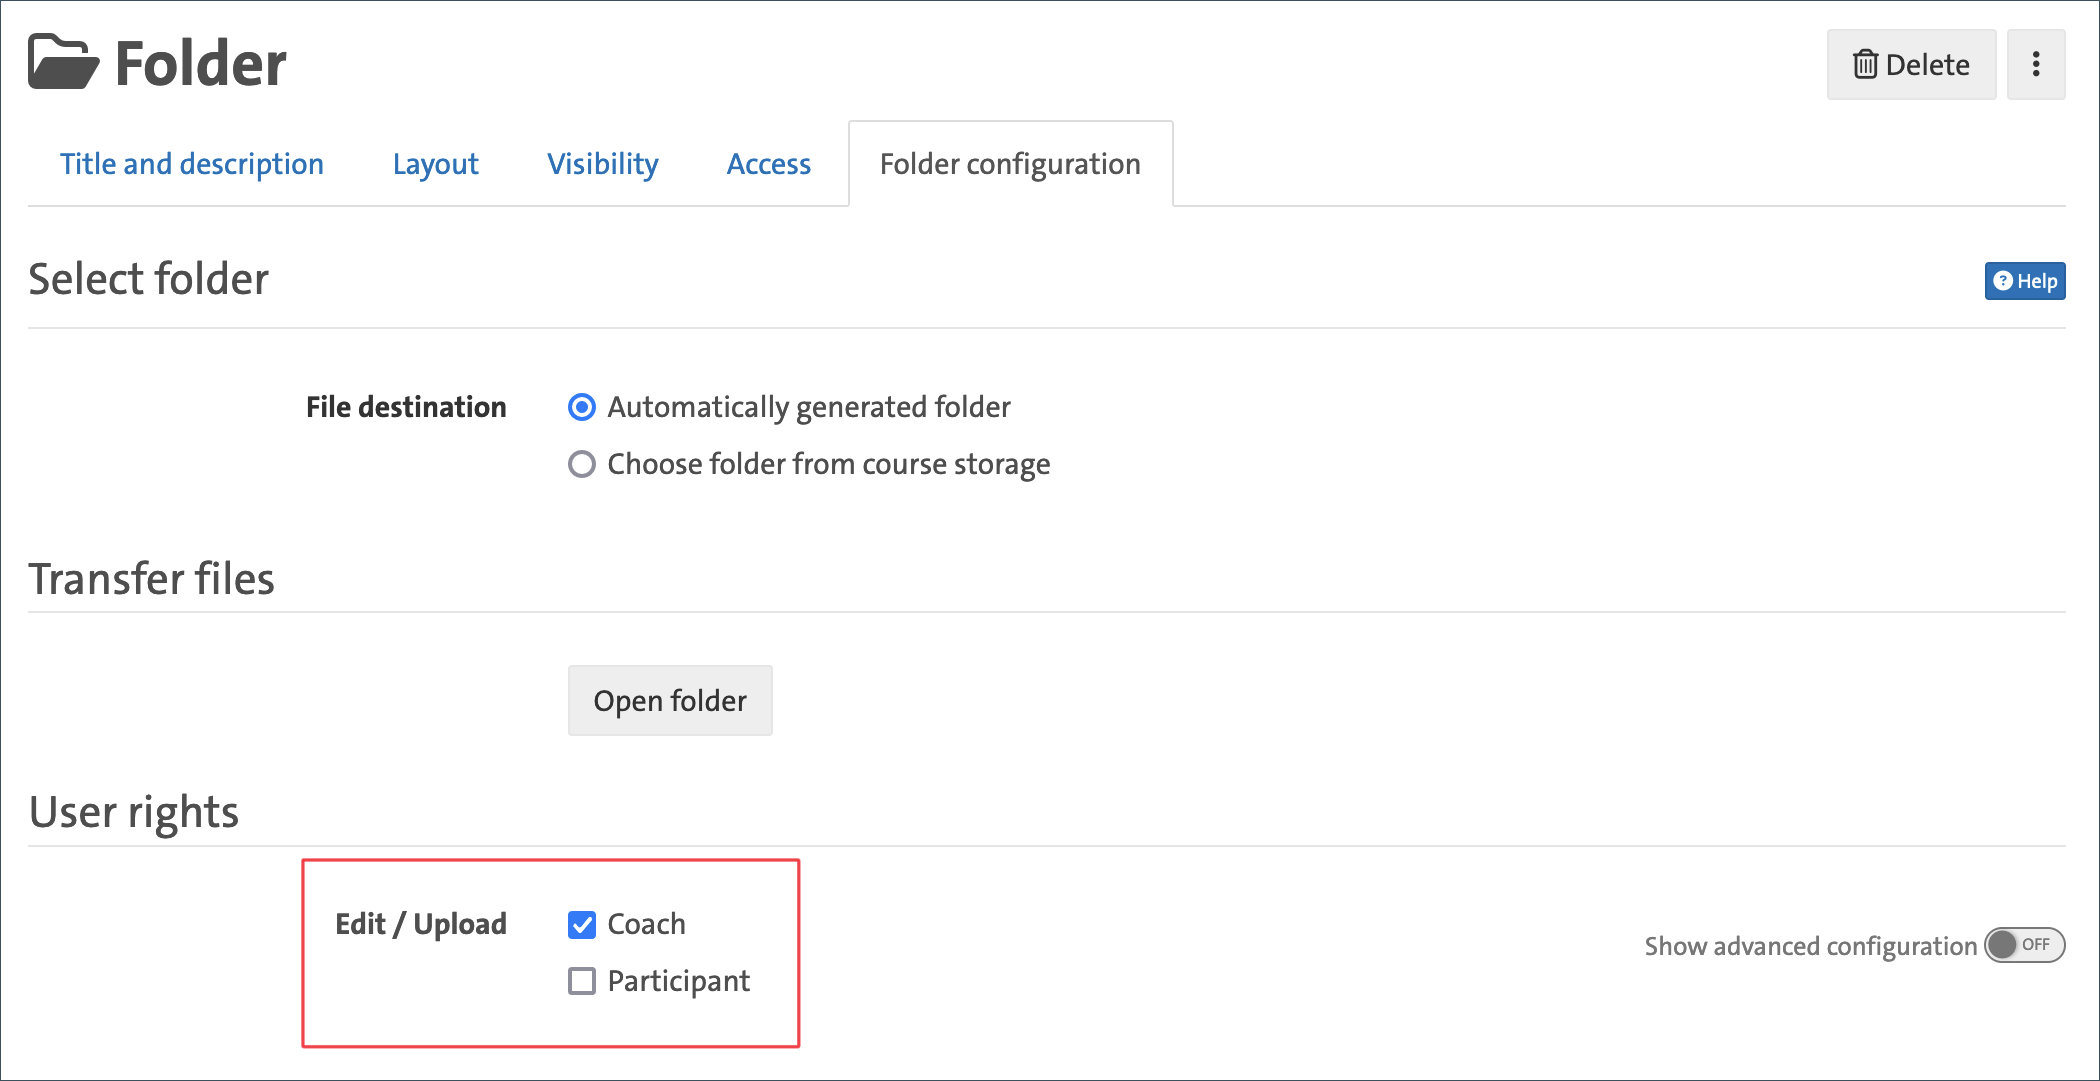
The Folder course element is ideal for exchanging files with members in the OpenOlat course. All common file formats can be uploaded and downloaded. In addition, subfolders with descriptions can be created to make orientation even easier.
| Tip: In the folder configuration, you can also set that all course members are authorized to upload files. This option is deactivated by default. |
You also have access to the usual file management options that you are already familiar with from Windows or Apple devices. For example, you can restore, move or copy deleted files and folders.
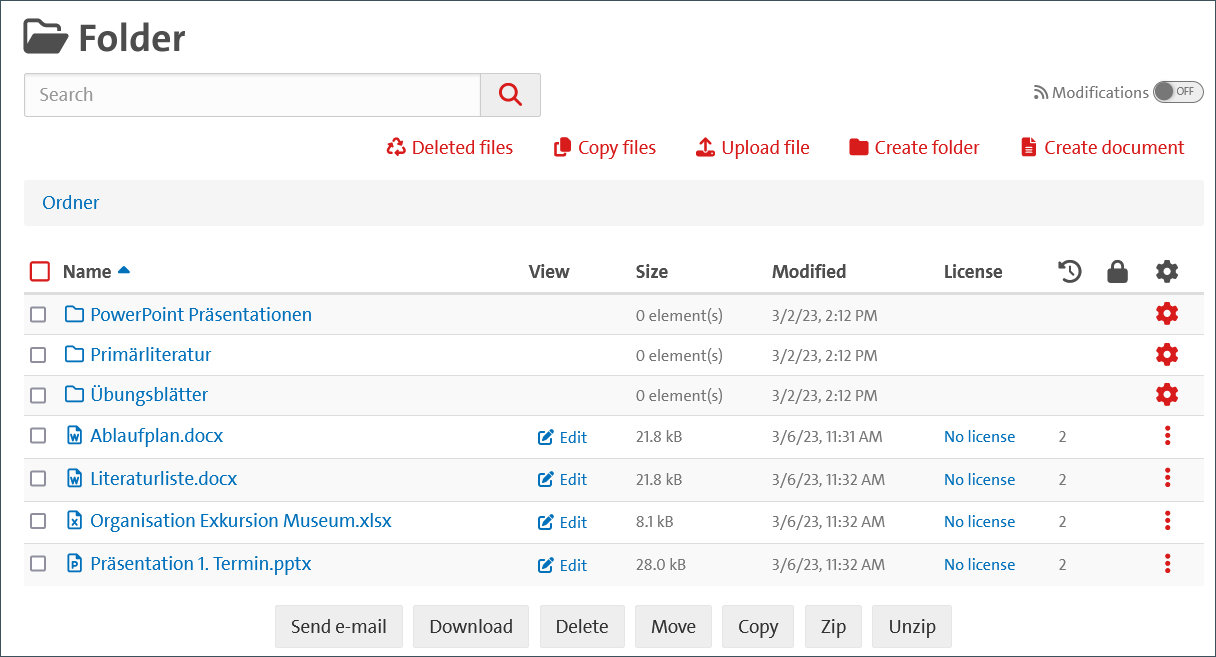
| Tip: Use the “Zip” and “Unzip” functions (see Fig. 2) to quickly and easily download or upload several files at once. |
The Folder course element is also an all-in-one solution because you can create files directly in it. This speeds up the work processes and saves time.
The following files can be created and edited directly in OpenOlat:
- Text (.txt)
- Word (.docx)
- Excel (.xlsx)
- PowerPoint (.pptx)
- HTML-Document (.html)
- Cascading Style Sheet (.css)
- Extensible Markup Language
Further information on this can be found in Helpcard 20-120 „OnlyOffice“ (In German) and in the following section.
OnlyOffice
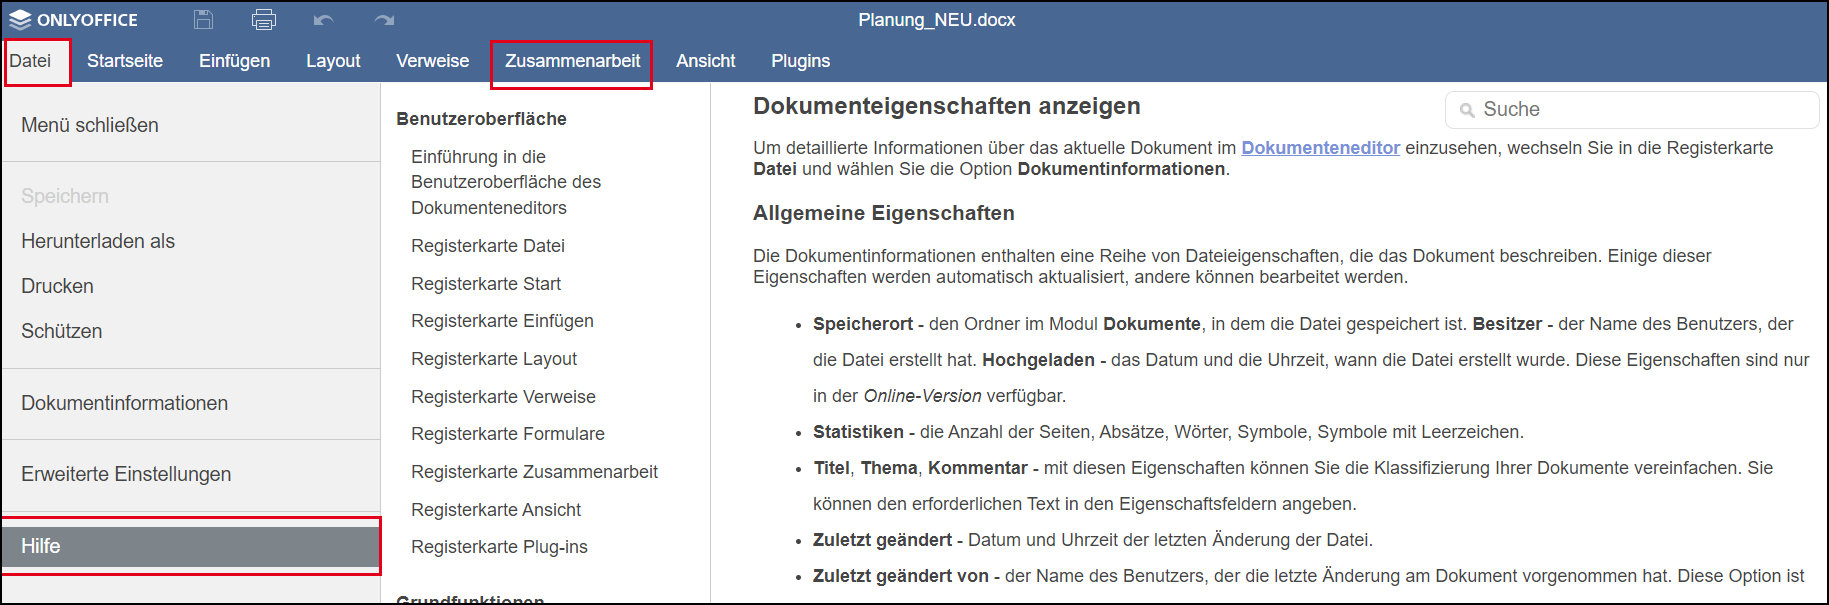
OnlyOffice is a collaborative office platform that enables all OpenOlat members to work on documents, spreadsheets and presentations together in real time. In a seminar context, for example, OnlyOffice can be used to collaborate on projects, research papers or presentations. This allows several course members to work together on a document without having to transfer changes manually. In addition, OnlyOffice can also be used for revising working drafts or discussing changes, as it provides an easy way to review and revise documents.
The outstanding strength of OnlyOffice lies in the use of common Word, Excel or PowerPoint file formats. This means that there are no compatibility problems. You can both download and upload files and thus edit them locally at any time.
How do I use OnlyOffice in OpenOlat?
Simply use the Folder course element. There you can either upload existing files and edit them in OnlyOffice or create a file directly in OpenOlat. You can then download this at any time and leave the working file online.
Furthermore, OnlyOffice can also be integrated into the course with the course element Document. This is useful, for example, if you want to provide a schedule for a course day at the front of the course. Or you can use this method to prepare the materials for the upcoming seminar day and make them available.
Practical tip: Get to know the full range of OnlyOffice functions
Page
The course element page offers OpenOlat-users another opportunity to provide systematically structured teaching and learning content. With this course module, it impossible to arrange the course content in a targeted manner with the help of different layout variants and to make it clear through the block-based presentation. Text files, images, quotes, but also diagrams or tables can be clearly integrated into your course and can also be used, e.g. next to each other. This is an additional feature compared to the HTML page. The new arrangement options allow for multi-layered organisation in the learning environment by teachers.
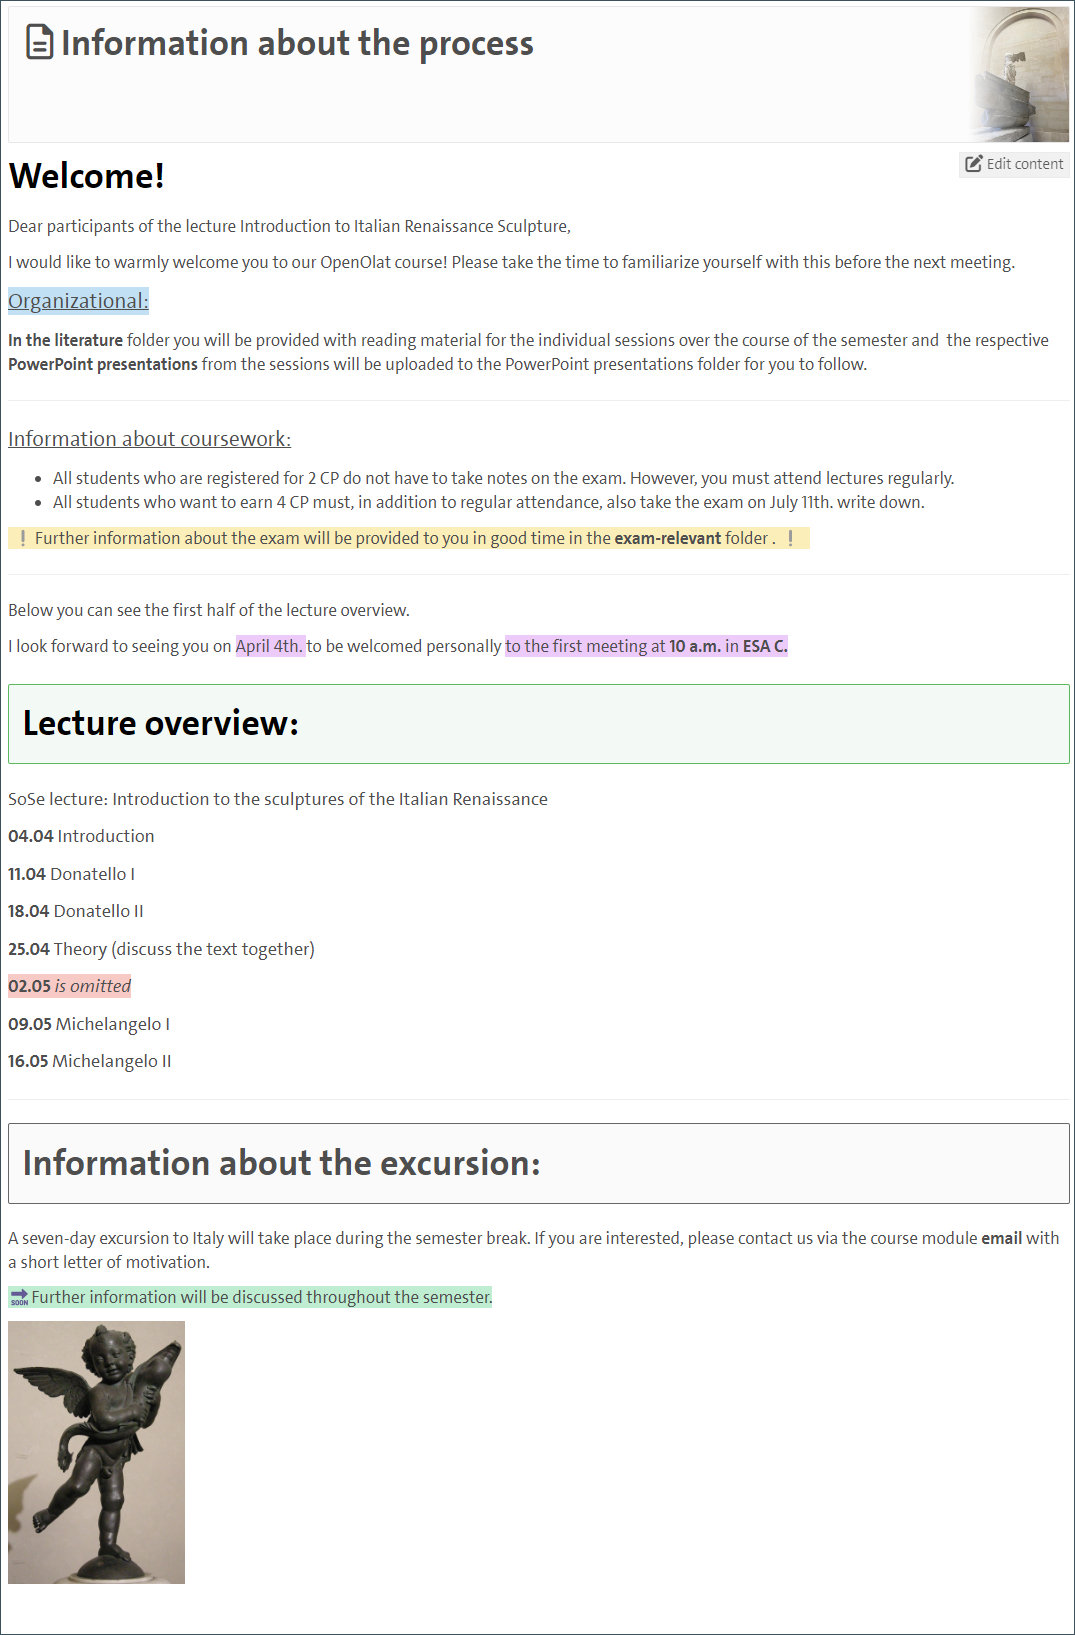
Practical example: seminar information-page
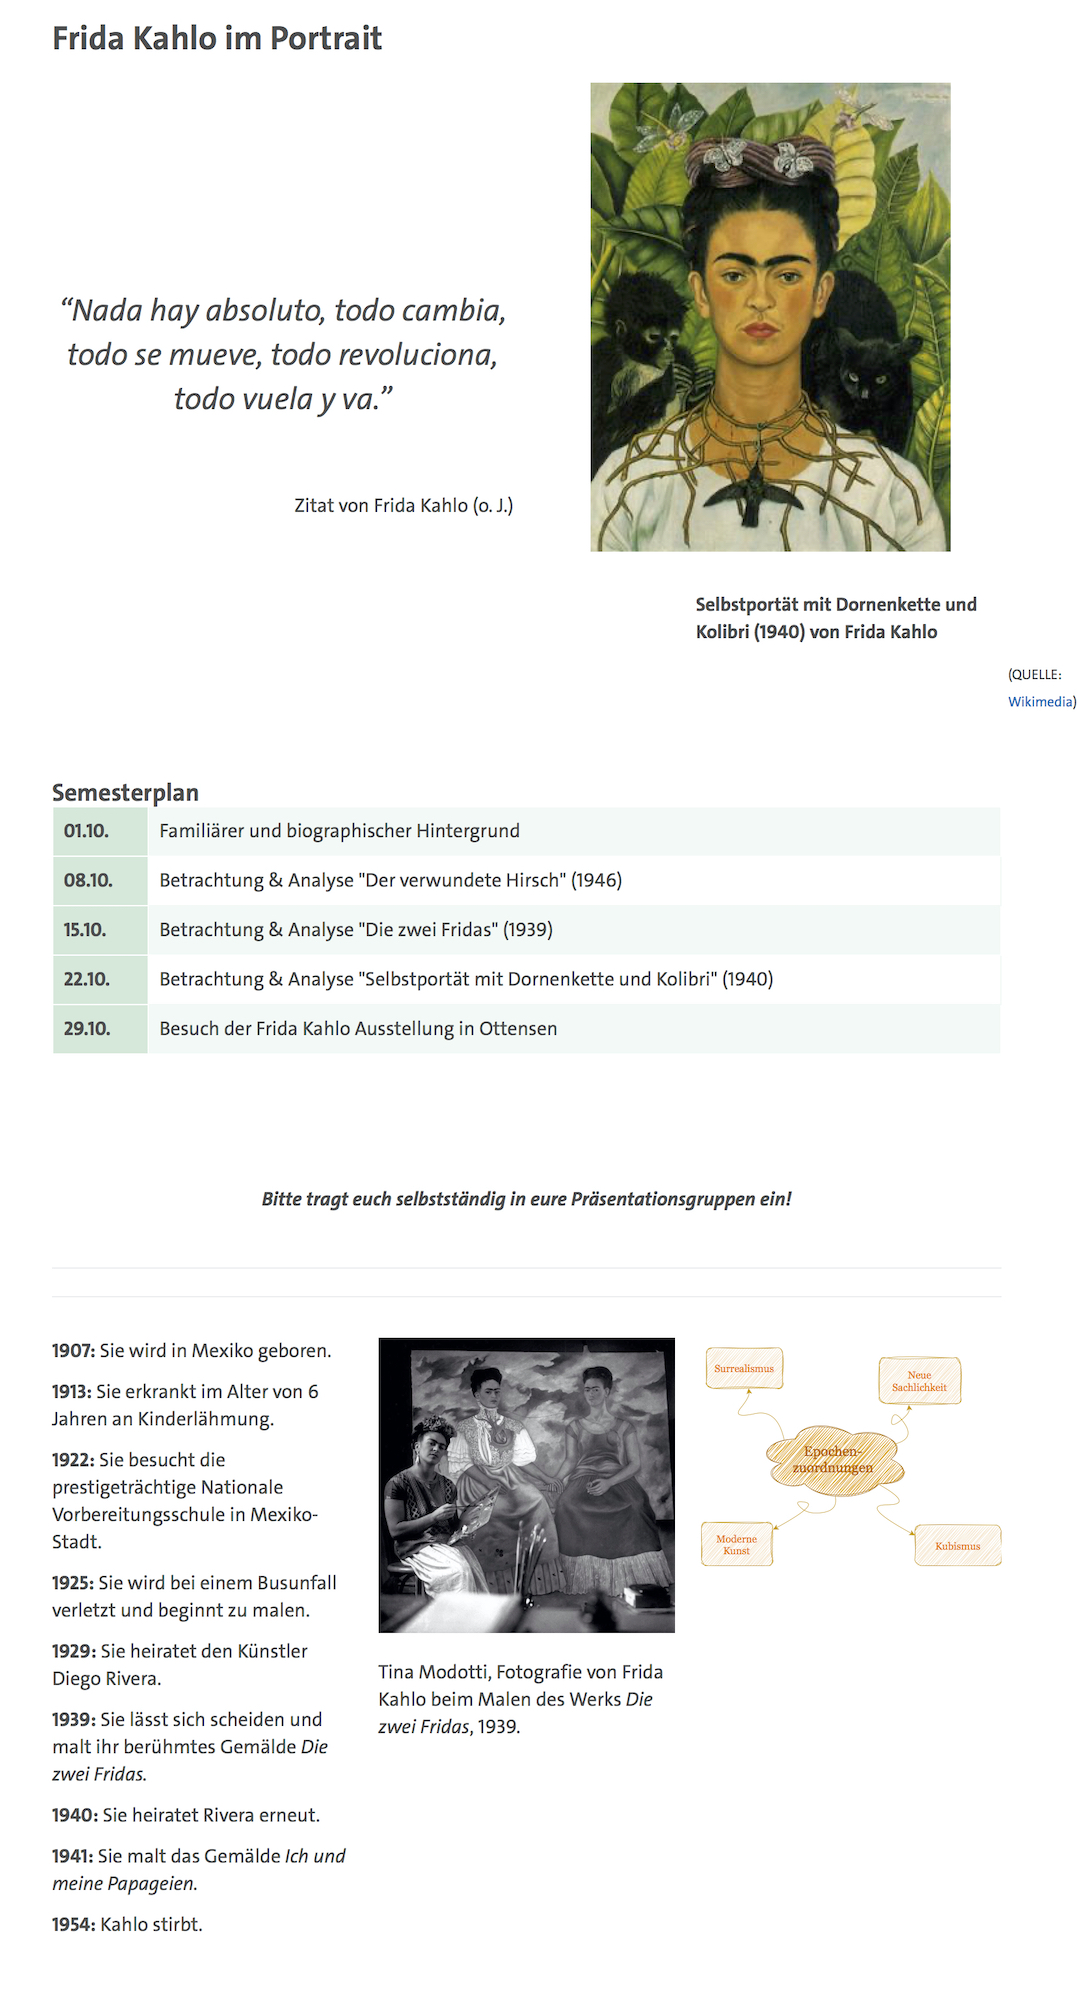
Fig. 1: An exemplary structure of the course module Page
|
Note: Whether diagrams, tables, handwritten notes or mind maps - the draw.io function supports you in visualizing and organizing your content. It is possible to use this in OpenOlat under Projects or in the Portfolio course element. We recommend that you try out the “draw.io” function in the “Page” course element for collaborative tasks. Possible scenarios: 1. for example, to create a collaborative mind map on a topic or seminar session on the tablet and collect thoughts, questions and ideas. 2. it is also possible to create a collaborative whiteboard on the CTOUCH. You can find brief instructions on how to do this in our OpenOlat "Treffpunkt" course. The draw.io function proves to be particularly practical in the form of integration in the “Page” course element. This allows the notes and annotations created together in the seminar to be saved centrally in one place. They can also be accessed by all participants at any time, so that the mind map or whiteboard can continue to grow over several sessions. |
HTML-Page
You can use the HTML-page course element to insert information in the form of various media into your course. Text files, videos, images and HTML-pages can be integrated directly into OpenOlat.
This allows you to show, for example, music videos (e.g. from YouTube or Lecture2Go) or images of art pieces.
At the start of the semester, you can formulate a welcome text directly in the text editor of the HTML-page course element or list the presentation topics for the sessions as an overview. The clear provision of central information makes it easier for you and the students to stay organized throughout the semester. It also offers students the opportunity to plan the semester in advance and deal with individual aspects at an early stage.
Practical example: Home page
For example, you can easily design an appealing homepage for your OpenOlat course using the text editor. You can use images to tease the course content and set this in the title in the “Layout” function or add it to the text. For an aesthetic and structured start page, it is a good idea to work with colors. The easiest way to do this is to use the Background color tool or define a colored paragraph under Format. You can also use the “Horizontal line” tool to visually divide sections. For a dynamic appearance, simple symbols such as exclamation marks can be replaced with emoticon symbols.
External pages
Constantly switching between several tabs in the browser can become annoying over time. If you want to work specifically with a website in your seminar session, you can integrate it directly into the course for all OpenOlat users. This means that you are not forced to leave the learning platform.
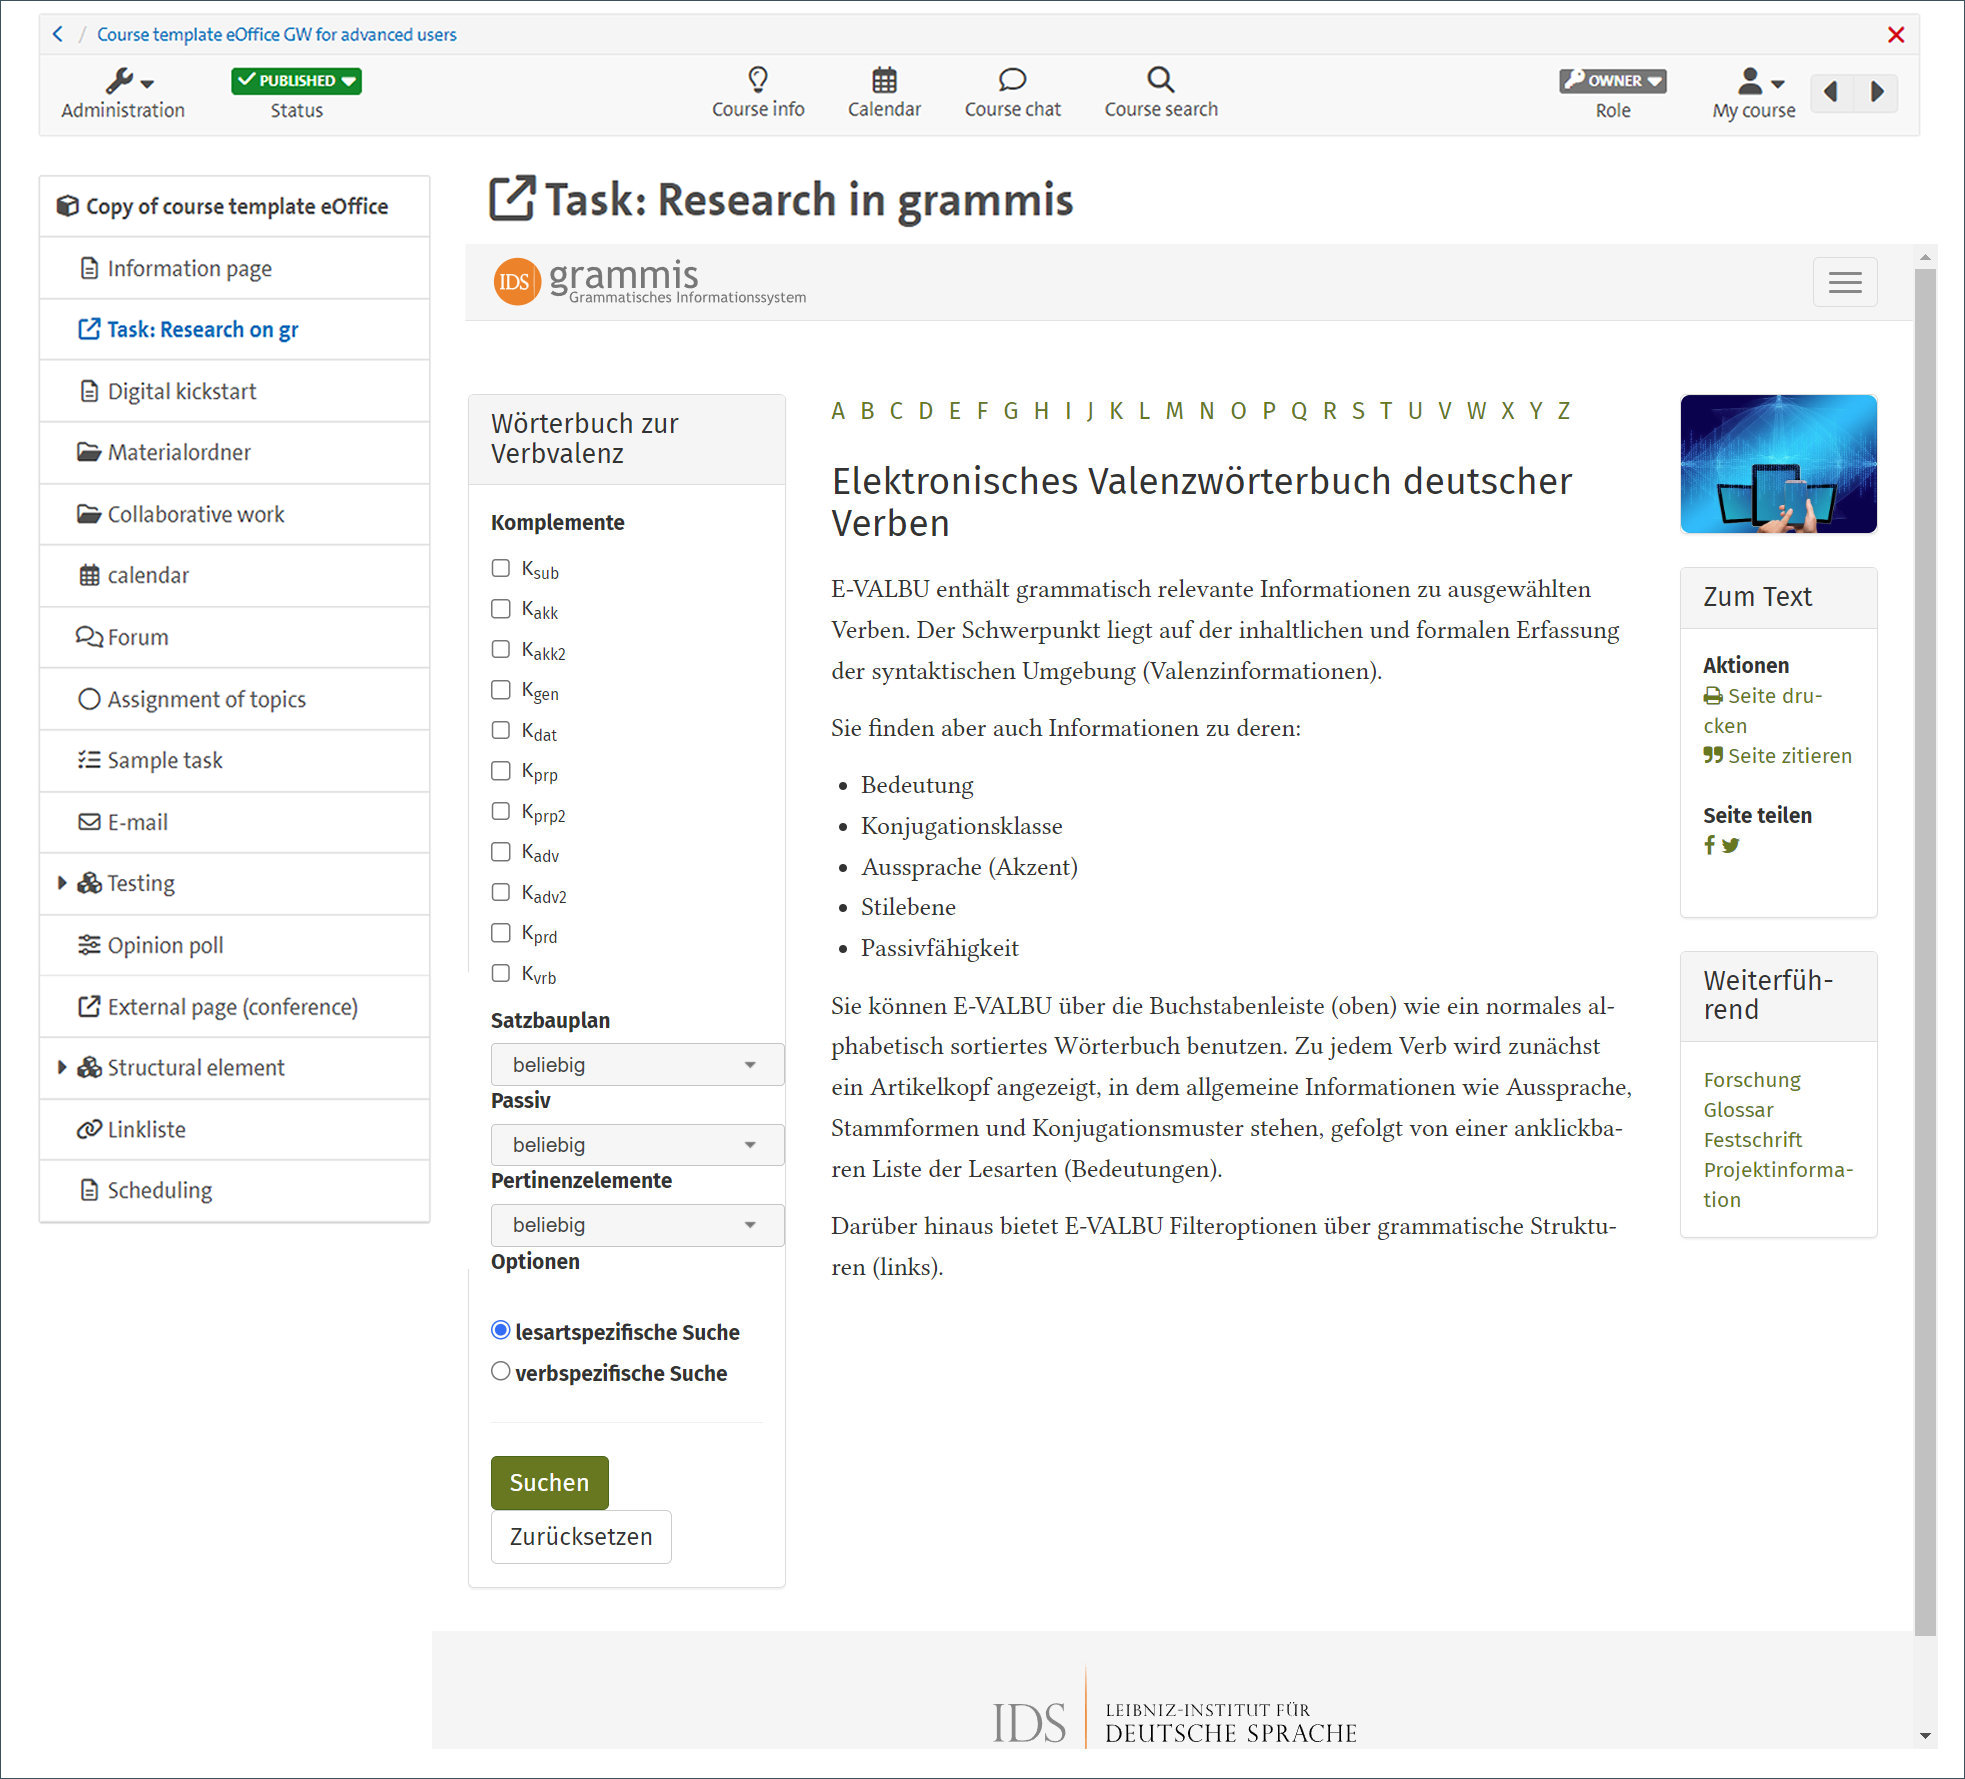
Practical example: Assignment
For example, students could use grammis (In German) to complete the following example task directly in OpenOlat during the session.
For the following underlined examples, decide whether they are additions or statements in the sense of valence grammar.
-
Lisa donates a fixed amount to the local animal shelter every month.
-
Peter lends his sister an umbrella.
-
We rent out our vacation home in Spain to strangers.
The advantage: You can provide students directly with the learning aids they need. You can also save all the helpful tools on your link list and thus gradually create a pool of useful pages and make them available to the OpenOlat course.
Practical example: Semester Apparatus of the “Stabi”
The Stabi's digital semester apparatus (“Semesterapparat”) can be integrated into the “External page” course element. This makes it directly available to participants in the OpenOlat course. To make this possible, all you need to do is adjust the configuration in the “Page content” area by ticking the “Embedded (source visible)” box.
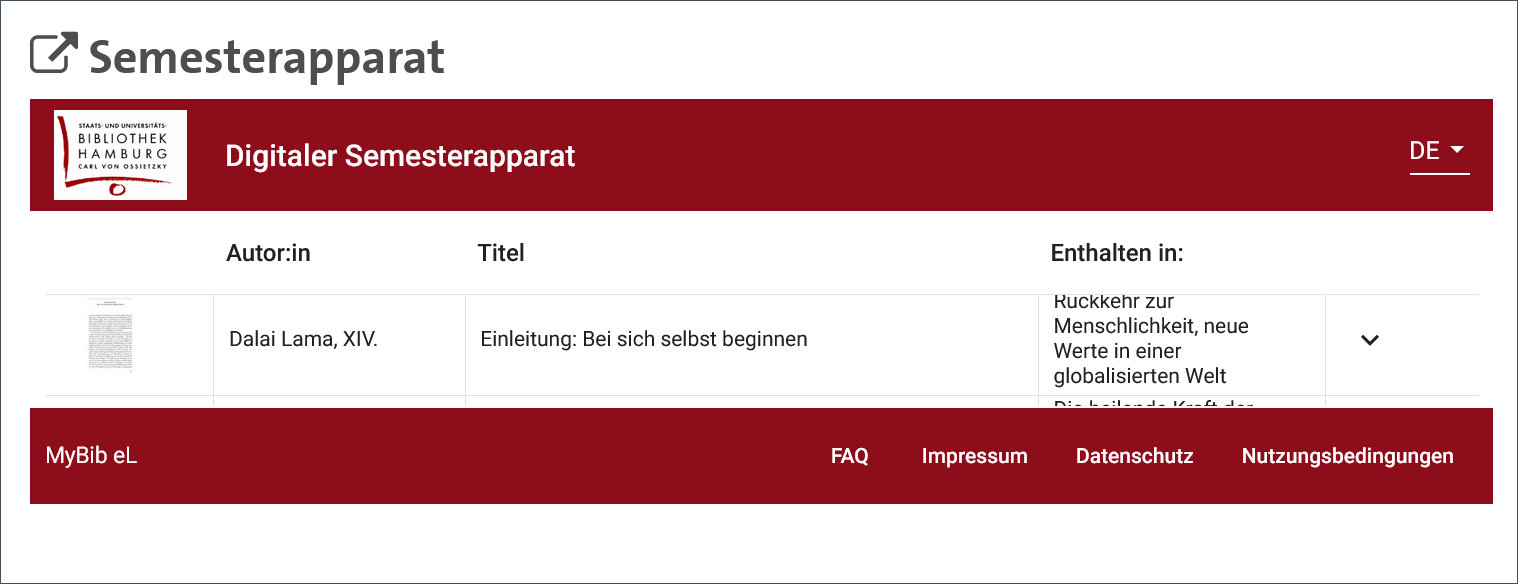 Fig. 6: An examplary “Semesterapparat” integrated as an “External page”
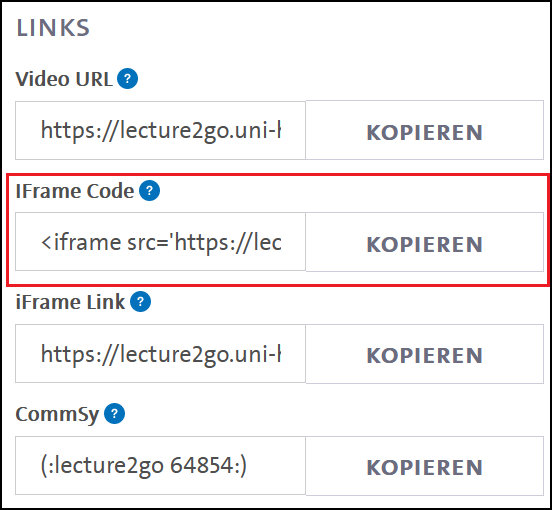
Lecture2Go
Events are often supplemented with an offer on Lecture2Go. Lecture2Go videos can be quickly and easily integrated into OpenOlat. Password-protected videos can also be integrated into OpenOlat. Only the course members have access to the protected video, but they do not have to enter the password each time.
How do I integrate an Lecture2Go video into my OpenOlat course?

Link list
Links to websites, archives and databases accumulate continuously during the course of the seminar. These can be collected on one page using the link list course element and made accessible to all members. You can also involve the students in the creation of the link list by collecting ideas together in a session. In this way, a wide range of useful, interesting or important websites can be created and placed in the context of the seminar.
Here is an example of what a link list could look like for the subject of art history:
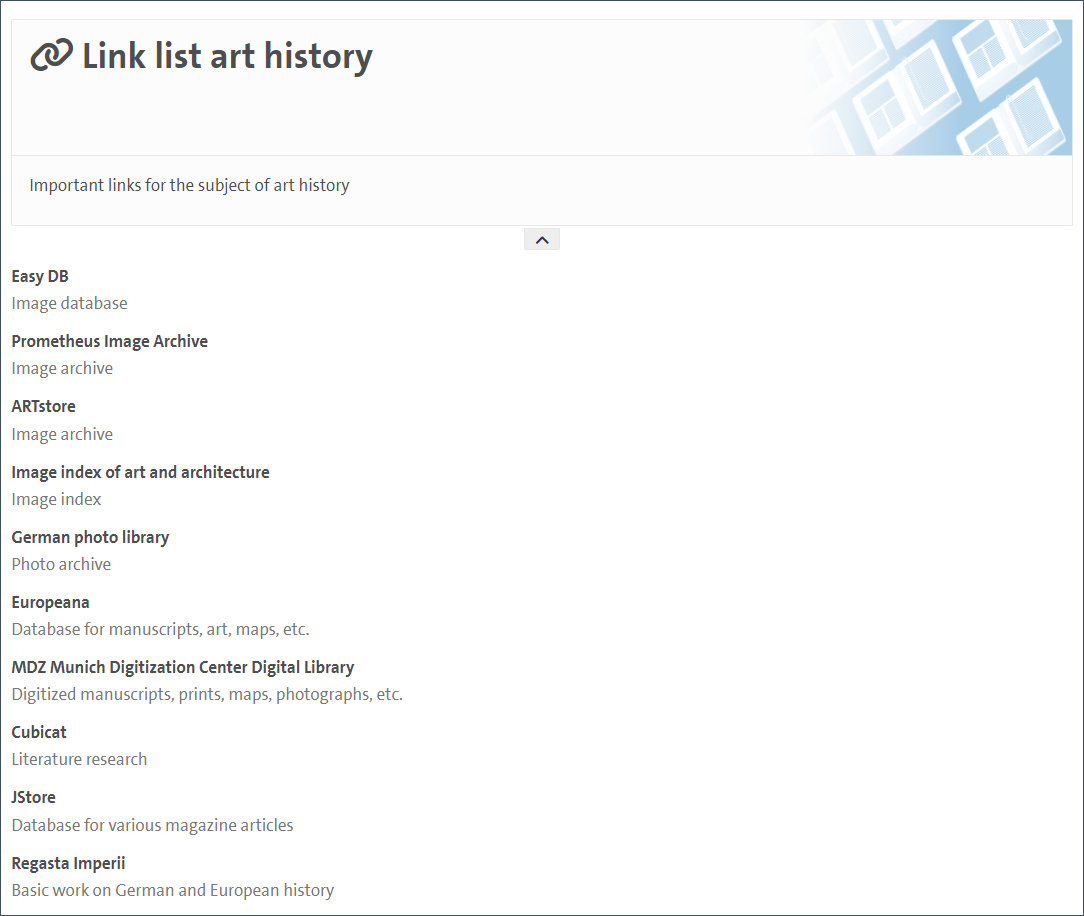 Fig. 9: An examplary link list
You can classify the link list according to the typical OpenOlat principle of layout, visibility and access.
Further information on creating a link list can be found on HelpCard 30-140 „Linkliste einfügen“ (In German).
- Tip: In the link list, you can select whether the link is opened in a new window or the one that is already open. Here it is advisable to always specify New window.
Forms in OpenOlat
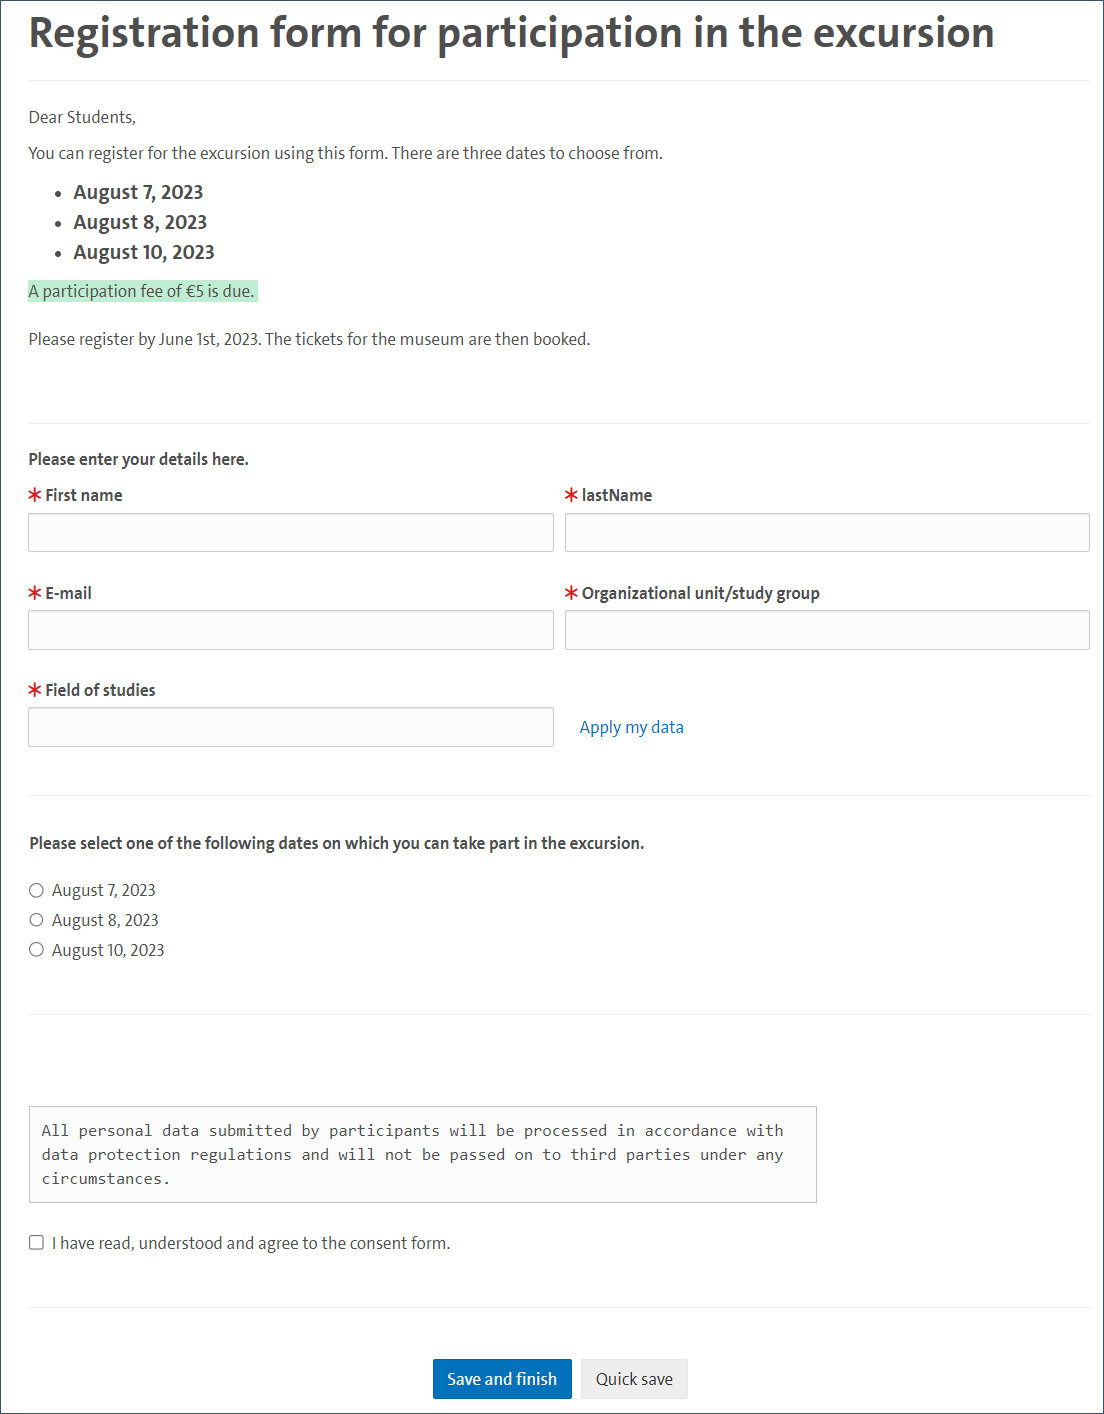
The learning resource form can be used within courses for different purposes and with different course elements.
For example, a registration form for an excursion can be created directly in OpenOlat (see Fig. 9). In addition, detailed surveys can also be designed and carried out. The editor contains a wide range of design options, allowing both very simple and complex requirements to be realized. The best way to find out exactly how the form editor works is to read the OpenOlat manual. The individual operating elements are clearly explained there with the help of screenshots.
A list of all course elements in which forms can be integrated, including practical examples, can be found in the following overview: